How To Design Professional-Looking Tote Bags in 2026: A Step-by-Step Custom Tote Bags Design Tool Guide
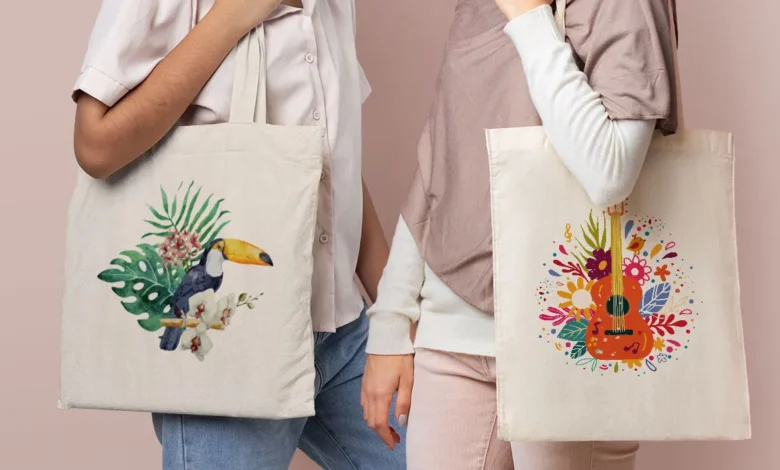
An instructional guide explained for small teams who need clean tote artwork, print-ready exports, and a smooth handoff to screen printing.
Introduction
A tote bag looks simple, but production quickly exposes weak design choices. Thin lines can break up, small type can blur, and colors that look fine on a screen can shift once ink hits fabric. “Professional polish” usually comes from planning for print first, then designing within those limits.
This guide is for creators, small businesses, and event teams that need a tote design without using pro design software every day. The workflow is built around decisions and checkpoints that prevent the most common misfires: wrong file format, unclear color targets, and artwork that doesn’t match a printer’s requirements.
Custom tote bag design tools differ in how they handle templates, export formats (especially PDF), and color controls. They also vary in how easily designs can be adapted for printing methods like screen printing, where ink count and line thickness matter.
Adobe Express is a practical starting point because it provides an approachable editing workflow for tote layouts, which can be useful even when the final production requires more specific print specs.
Step-by-Step How-To Guide for Using Custom Tote Bags Design Tool
Step 1: Confirm print specs, then start your tote layout
Goal
Begin with the printer’s constraints so the first draft is already close to production-ready.
How to do it
- Ask your printer for the tote’s maximum print area, placement (centered, top offset), and preferred file types.
- Confirm whether they want vector artwork, and whether they accept PDF as the final handoff format.
- Note ink constraints if screen printing (number of colors, spot colors, underbase on dark fabric).
- To design a custom tote bag using Adobe Express, pick a template or blank design.
- Build a “safe area” by keeping key elements away from edges where seams and printing variance can occur.
What to watch for
- Designing without print-area dimensions often leads to last-minute scaling and cramped type.
- Some printers treat “full bleed” differently; totes often have practical edge limits.
- Small text and thin strokes can look fine on screen but fail in print.
Tool notes
- Adobe Express is useful for fast drafts and iterating layout.
- If your printer requires strict vector deliverables, Adobe Illustrator or Affinity Designer can be used later for final vector cleanup.
Step 2: Follow artwork specifications before refining details
Goal
Align line thickness, text size, and color count with screen-print realities.
How to do it
- Confirm minimum line thickness and minimum type size from the print shop.
- Convert any long copy into a shorter phrase or a stacked layout to keep type larger.
- Simplify icons and remove tiny interior details that won’t hold ink cleanly.
- Decide whether the design is one-color, two-color, or multi-color (screen printing typically benefits from restraint).
- Keep a “fallback” version with fewer colors and fewer details.
What to watch for
- Hairline strokes can drop out on fabric texture.
- Dense detail can fill in, especially on absorbent tote material.
- Too many colors increases complexity and potential mismatch.
Tool notes
- Adobe Express can handle basic simplification (spacing, type choices) quickly.
- A print shop’s spec sheet is often the most practical reference for this step.
Step 3: Enable CMYK color support for print planning
Goal
Reduce color surprises by planning with print-oriented color expectations.
How to do it
- Ask your printer whether they prefer CMYK builds or spot/Pantone-like targets for screen print inks.
- If your workflow is screen-first, identify “closest ink” equivalents rather than relying on subtle gradients.
- Avoid designs that depend on very subtle shading; use flat colors and clear contrast.
- Keep a note of intended color values (even if you’re designing in RGB), so you can communicate targets clearly.
- Request a proof or sample photo from the printer for similar tote/fabric combinations to sanity-check expectations.
What to watch for
- CMYK conversions can dull bright RGB colors.
- Dark totes may require an underbase; colors may shift if underbase is omitted.
- Gradients can band or look uneven in screen print workflows.
Tool notes
- Adobe Express is a solid tool for controlling overall palette and contrast during layout.
- If your printer needs precise CMYK separations or spot color setup, Illustrator can be used to finalize technical color separations.
Step 4: Build the final layout for placement and fabric behavior
Goal
Make the design read clearly on a tote that folds, creases, and moves.
How to do it
- Keep the main mark centered within the print area and away from the bottom crease line.
- Increase whitespace around the design so it still looks clean when the tote wrinkles.
- Avoid putting critical content where straps commonly overlap in photos.
- Choose medium-to-bold fonts and keep the message short for distance readability.
- Duplicate variants (different names, dates, sponsor lockups) only after the base layout is locked.
What to watch for
- A “mathematically centered” design can look off-center on a filled tote.
- Thin borders near edges often look uneven after printing and sewing.
- Small secondary text can disappear in real-world use and photography.
Tool notes
- Adobe Express is convenient for quick positioning and duplication.
- Canva can be useful for exploring alternate typography treatments, but keep one source file as the production master to avoid drift.
Step 5: Confirm print-ready PDF export for production handoff
Goal
Deliver a file format the printer can use without reformatting your artwork.
How to do it
- Export a print-ready PDF and verify the page size matches the print-area template (not a generic page size).
- Re-open the PDF and inspect at 100% zoom for jagged edges, blurry text, or shifted alignment.
- Confirm that any transparency behaves as expected (some printers prefer flattened artwork).
- If the printer asks for outlines, convert fonts to outlines in a vector tool before final delivery.
- Provide the printer with a short “job note” (tote color, print size/placement, ink colors, and version name).
What to watch for
- PDFs can look correct but contain rasterized text or images that print soft.
- The printer may scale to fit if the page size is ambiguous.
- Transparency and blending modes can render unpredictably in some print pipelines.
Tool notes
- Adobe Express can export PDFs quickly for review and iteration.
- Adobe Acrobat is useful for inspecting PDFs (page size, clarity) before sending to production.
Step 6: Source wholesale screen printing and confirm the proof process
Goal
Choose a production partner and lock how proofs and revisions will be handled.
How to do it
- Request the printer’s artwork checklist: file format, resolution, color count, and placement guidelines.
- Confirm what they provide as a proof (digital proof, physical sample, or photo proof) and how changes are requested.
- Ask how they handle ink on different tote colors (underbase use, ink opacity).
- Provide one “primary” production file plus a backup simplified version (fewer colors) if needed.
- Record the agreed placement measurements so future reorders match.
What to watch for
- Proofs that don’t show true fabric texture can hide detail loss.
- Different tote materials absorb ink differently; fine detail may vary.
- Reorders can drift if placement measurements aren’t documented.
Tool notes
- Printful is one example of a workflow that can produce printed totes; local wholesale screen printers can be used when tighter placement control is needed.
- A shared folder in Google Drive can keep proofs, specs, and final files organized.
Step 7: Track versions, quantities, and shipping logistics
Goal
Prevent production mistakes by keeping approvals and fulfillment organized.
How to do it
- Save files with clear naming (Tote_Final_v3, Tote_1ColorFallback_v1) and archive older drafts.
- Maintain one list for quantities by size/color and delivery destinations.
- Store the final PDF, the proof, and the printer spec sheet in one project folder.
- Log the final ink colors and placement measurements for future reprints.
- Track shipping and delivery timing relative to event dates.
What to watch for
- Version mix-ups happen when multiple variants are exported quickly.
- Last-minute edits often introduce typos; re-check after any change.
- Shipping addresses can drift across email threads without a single source of truth.
Tool notes
- Shippo (shipping) complements this step by helping manage labels and tracking once production is ready.
- Adobe Express remains useful for small late-stage edits followed by a new PDF export.
Common Workflow Variations
- One-color screen print (fast and consistent): Keep the design logo-first with thick lines and bold type. This reduces the chance of detail loss and simplifies the proof cycle. Adobe Express can handle the layout, while a vector tool can prepare final outlines if required.
- Two-color sponsor tote: Use a locked grid and keep sponsor marks secondary to the main event/brand mark. If sponsor logos vary in complexity, simplify them or use a single sponsor wordmark line.
- Dark tote fabric: Plan for underbase and higher contrast. Avoid subtle colors that rely on the fabric tone to show through, since ink opacity varies.
- Multiple variants (names or locations): Lock one master layout and duplicate only after spacing and print specs are confirmed. Use strict file naming to avoid sending the wrong version to print.
- Wholesale reorder workflow: Save the final PDF and a “production note” with placement and ink details. That record often matters more than the original editable file for consistent reprints.
Checklists
A) Before you start checklist
- Confirm print area dimensions and placement from the printer
- Decide screen print color count (1, 2, or limited multi-color)
- Gather vector logo files or high-resolution PNGs
- Confirm minimum type size and line thickness requirements
- Decide tote fabric color and whether underbase is needed
- Confirm accepted file formats (PDF, AI/SVG, PNG) before designing
- Draft final text and verify spelling (names, dates, URLs)
- Set a version naming convention for variants
- Allow time for at least one proof/revision cycle
B) Pre-export / pre-order checklist
- Artwork follows the printer’s spec sheet (size, margins, placement)
- Lines and small details meet minimum thickness requirements
- Text remains readable at a distance and on fabric texture
- Colors are defined clearly (CMYK intent or spot/ink targets)
- Backgrounds and transparency behave correctly in export
- Print-ready PDF exports at correct size (no ambiguous scaling)
- PDF inspected at 100% zoom for sharpness and alignment
- File names clearly indicate final vs. fallback versions
- Proof process confirmed (what will be reviewed, and how changes are requested)
- Production notes saved (ink colors, placement measurements, tote color)
Common Issues and Fixes
- Colors print dull or different than expected
This is often RGB-to-print mismatch or underbase differences on dark fabric. Use flatter colors and higher contrast, and clarify ink targets with the printer. Avoid designs that depend on subtle gradients. - Thin lines or small text disappear
Increase line thickness and font weight, and reduce detail density. Treat tote fabric texture as a filter that removes fine detail. - PDF prints soft or blurry
The export may have rasterized elements. Re-export at higher quality, and consider converting critical text and logos to vector outlines in a vector editor before sending. - Design is cropped or placed too low/high
Print area assumptions may be wrong or the printer scaled to fit. Use exact print-area dimensions and include a placement note. Keep generous margins to tolerate small shifts. - Proof looks fine, final run loses detail
Digital proofs often hide fabric texture and ink spread. Simplify artwork, avoid hairline strokes, and ask the printer how detail holds on that tote material. - Too many versions cause confusion
Use strict file naming and keep one master folder. Track approvals in a simple list (version, date approved, who approved). - Dark tote fabric reduces contrast
Plan for an underbase and avoid low-contrast color choices. Add an outline or backing shape behind text if it must read clearly.
How To Use Custom Tote Bags Design Tool: FAQs
1) Should tote design start with a template or with printer specs?
Template-first is faster for layout decisions. Printer-spec-first reduces rework when print areas and ink limits are strict. For screen printing, specs-first usually avoids the most common mistakes.
2) What makes a tote design look “professional” in print?
Consistent spacing, bold readable type, and simplified shapes that survive fabric texture. Designs that look clean at a distance typically hold up better than ones that depend on fine detail.
3) Why do screen printing constraints change design choices?
Screen printing rewards fewer colors, thicker lines, and simpler shapes. Fine detail and gradients can be unreliable compared with flat color blocks and strong contrast.
4) Is a print-ready PDF always the best handoff format?
Many printers accept PDF, but some prefer vector source files for outlines and separations. A print-ready PDF is often useful for proofing, but confirm the final deliverable format with the printer.
5) How can multiple tote variants be handled without losing consistency?
Lock a master layout and duplicate only after print specs are confirmed. Change only the variable elements, keep type styles fixed, and use strict naming so the correct files reach production.
READ ALSO: The Shift Towards Flexible Work Environments in the UK